Saturday, September 23, 2006

Fabric and fibre Postcards: Day 37


After reading my daily dose of inaminuteago this morning,I realised how little beading I've incorporated into the cards I've made.

I wonder if this is because the themes and numbers needing to be made within a certain timeframe are causing me to drift away from my love of hand work and CQ.

The two cards featured today have a little beading,but none of the bead trails I normally like to add to my CQ blocks.

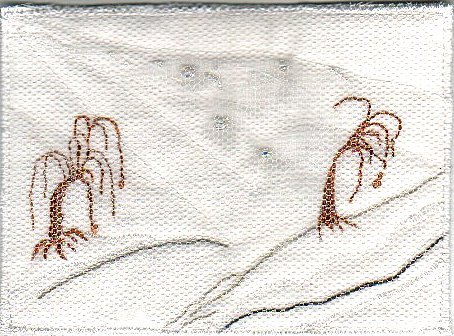
The white card,based on a Haiku has only a few small Swarovski crystals to represent hail stones.

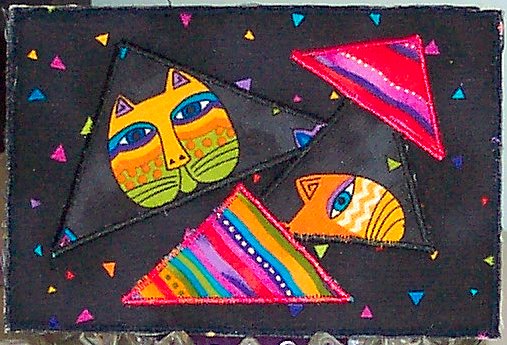
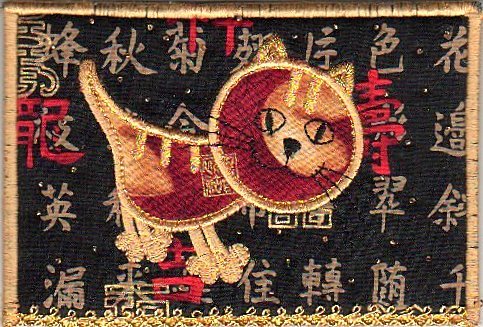
The black and gold card by MarianneB of Postmark'dArt has tiny gold Delica to tie in with the gold stitchery and pictograms.

Some points to consider as you add beading to postcards is the "threat of the postal (bead) munching machinery"!
"But",you say "I've had my postcard hand cancelled"
That's well and good,but,trust me,at some stage your precious card will be subjected to some amount of machinery processing,so.............

add an extra stitch or two,to firmly anchor the beads;
don't make your bead trails too chunky or clunky;
REMEMBER to keep the thickness of the card to one quarter of an inch;
and consider adding a layer of fine (bridal) tulle as an added protection for the beads.

Seed beads,Delica beads and plain and twisted bugle beads in the shorter lengths(size 2 & 3) seem to travel well.

Go have some beading fun. Posted by Picasa

Friday, September 22, 2006

kurliskottage: Wacky women & pincushions

kurliskottage: Wacky women & pincushions

Fabric and fibre Postcards: Day 36


Link

I KNEW I should have blogged before spending another four hours attacking the garden!
(All I want now is a hot relaxing bath to ease some aches)
So this will be brief!
Photographs and photo printing.

Yes,I did mention it on both Day 4,with VivianK's "Golden Ears Mountain" and
Day 10,with my "fractured landscape"
but what about printing and using one of your favourite photos..........like you as a kid,or your Mother (or who ever?)

I generally print on white/off white homespun that I have previously washed to remove sizing,and then dunked in BubbleJet Set liquid(Available from Ozecraft Lace & Dye) or if I have no BJS,I use a fabric conditioner,(much cheaper too!)

If I'm using the cotton homespun,I've found that if I iron the fabric to heat fusible paper-backed webbing the photo is then ready to trim and apply to Timtex/whatever immediately and saves an extra 'handling' of the fabric.
Don't forget to heat set (ironing) the photo after the inks have dried.

note; This method (i.e. using heat fusible on paper backing) does not work with silk!

You really need to use a fabric carrier sheet if you are attempting to print on a fine silk fabric........I learned this the hard way!!

Apologies,but I have no pic to share with you at the moment.

Thursday, September 21, 2006

and in a jesting mood........


I just had to share this cheery fellow with you!
This came from my friend Belle:
(remember back some months ago the postcard of the Goddess? hers too)
I received this happy chappie in a Carnival themed postcard swap a couple of days ago.
Belle's work is fantastic........and I really treasure her cards.Wouldn't you! Posted by Picasa

Fabric Postcards: Day 35


Sometimes a girl's just got to have fun!
And this card was the result of frustration over a journal quilt that was not behaving.
Needing idiot relief, I 'dug' in my cat stash where I had five or six related fabrics begging to be used,and just appliqued triangular shapes to the back ground.
I had fun;
it reduced frustration levels so much that I refer to the several cards I made as my 'cat-a tonics'.

It was fun and fast!

(I promise to be more serious tomorrow.) Posted by Picasa

Tuesday, September 19, 2006

Day 34: Fabric 'n fibre postcards


Okay,I'm sneaking in a bit early, but tomorrow may be hectic so I'm doing the post "early" in case Life gets in the way.

Back on day 30 I blogged a couple of attempts at "crystal balls" in preparation for a swap on Fiber Arts Traders,a Yahoo group I mentioned before.

I was happy with the resultant 'balls',but wondered why I had added such clunky,clumsy bases!

The solution?
Why ,frog-stitch the bases, and add smaller better balanced looking ones of course!
Hmmm........surgically removing heat fused fabric ,factor in that you have purple or orange on a rather light background,and the task is not easy.

To cut a long story.......the "clunks" were excised,and smaller bases added;

Then,on the card that was "I see Australian mail"
I added some fabric envelopes;
On the card that was "I see a cat in your future"
I added a cat face.

Oh I used Australian stamps in both the balls; and on the whole, I'm glad that I did a little corrective surgery. Posted by Picasa

Fabric n Fibre postcards: Day 33


Everthing is coming up daisies, originally uploaded by curli.

"Everything's coming up daisies"

A fun card made for a gardening friend;Using an off-cut of upholstery
fabric some flower motifs and a picket fence I found in a quilt shop.
A little machine work was done for stems and a knitting yarn was introduced as a creeper behind the fence.

Monday, September 18, 2006

Queen of the carnival!

  Posted by Picasa

Close-up

  Posted by Picasa

Fabric n fibre Postcards: Day 32

 
Now that I know they've made it through the postal system,meet two of my Carnival themed postcards!

They look familiar? You're right!
Back on September 5, I introduced you to my
"Masked Reveller" which was a journal quilt for the Australian New Zealand Art Quilters group.

Both the cards and the quilt were made using heat fusible webbing for the applique; Both the cards have metallic fibres and Angelina held in position with an overlay of tulle,and both cards feature a chunky "gem" above the mask.
I had great fun making these.....should have made a couple more. Posted by Picasa

Sunday, September 17, 2006

Another peek at my crystal ball

  Posted by Picasa

I forgot to add to the posting below.....the crystal ball works as a "shaker".
Shake the card and the stars move around.
I must get some glitter and try that out.

I added this extra photo to show the hands....the colour is more realistic in the previous shot.

Fabric and fibre postcards: Day 31


I had hoped to show my attempts at Stitch-and-Fuse Binding
but I spent too long improving my crystal balls.
This time I heat fused the fibres and cut them to a circular shape,which I then placed behind the clear plastic with a sprinkling of star shpes between the two layers.
I also appliqued a better shaped base for the ball.
On either side of the ball I've stitched hand outlines holding the ball.

Now,if you'd like to try the stitch n fuse binding......
You'll need one strip of your binding fabric measuring 1x13inches and
another strip of 1 x 10 inches,.

You'll also need paper backed heat fusible webbing cut to one strip of 1/2 inch by 13 inches
and another being 1/2inch by 10inches.

The webbing is fused on the wrong side of the fabric and along one edge.
The two resulting strips are then cut in half.
With the right(picture) side of card facing you,centre the non fused side of the fabric along the long edge and stitch a quarter inch from the edge.Remove paper from webbing and fold strip over to reverse of card,pulling it firmly to position.Press to fuse.
Repeat for other long side and trim binding to 6 inches.
Repeat similarly for the shorter sides.

For myself,I think satin stitched edges are quicker!
Try it and see what you think!. Posted by Picasa